Digital Notetaking
It's important to futureproof your research. Here is a possible way to do that..
Notes and Emergent Ideas
You do not have to do this.
But in recent years, I’ve found that a lot of my research materials are all online. Everything I read, everything I study. I use Zotero to handle bibliography and to push pdfs to an iPad with zotfile; then I annotate as I read on the device, and eventually, retrieve the annotations back into Zotero.
I read on a browser on my work computer too; I use hypothes.is with a private group where I’m the only member to annotate websites and pdfs when I can’t be bothered to send them to the ipad.
I use a notebook where I scribble out ideas and page numbers.
All of this material is scattered around. I’ve long admired the work of Caleb McDaniel, and his open notebook history. His research lives online, in a kind of wiki. Links between ideas and observations can be made that way and eventually, ideas can emerge out of the notes themselves by virtue of the way they’re connected. This is the idea behind what is called the Zettelkasten Method (‘slip box’, where each idea, each observation is kept on a discrete slip of paper numbered in such a way that connections can be formed):
A Zettelkasten is a personal tool for thinking and writing. It has hypertextual features to make a web of thought possible. The difference to other systems is that you create a web of thoughts instead of notes of arbitrary size and form, and emphasize connection, not a collection.
On a computer, such a thing can be created out of a folder of simple text files. Everything I observe, every idea that I have: one idea, one file. Then I use the free ‘second brain’ software, Obsidian to sit ‘on top’ of that stack of files to enable easy linking and discoverability.
You don’t have to do this. But I’d be really interested if you gave this a try this year.
Download and install Obsidian.
Then download and unzip my DH Lab Notebook. Put this somewhere sensible on your computer.
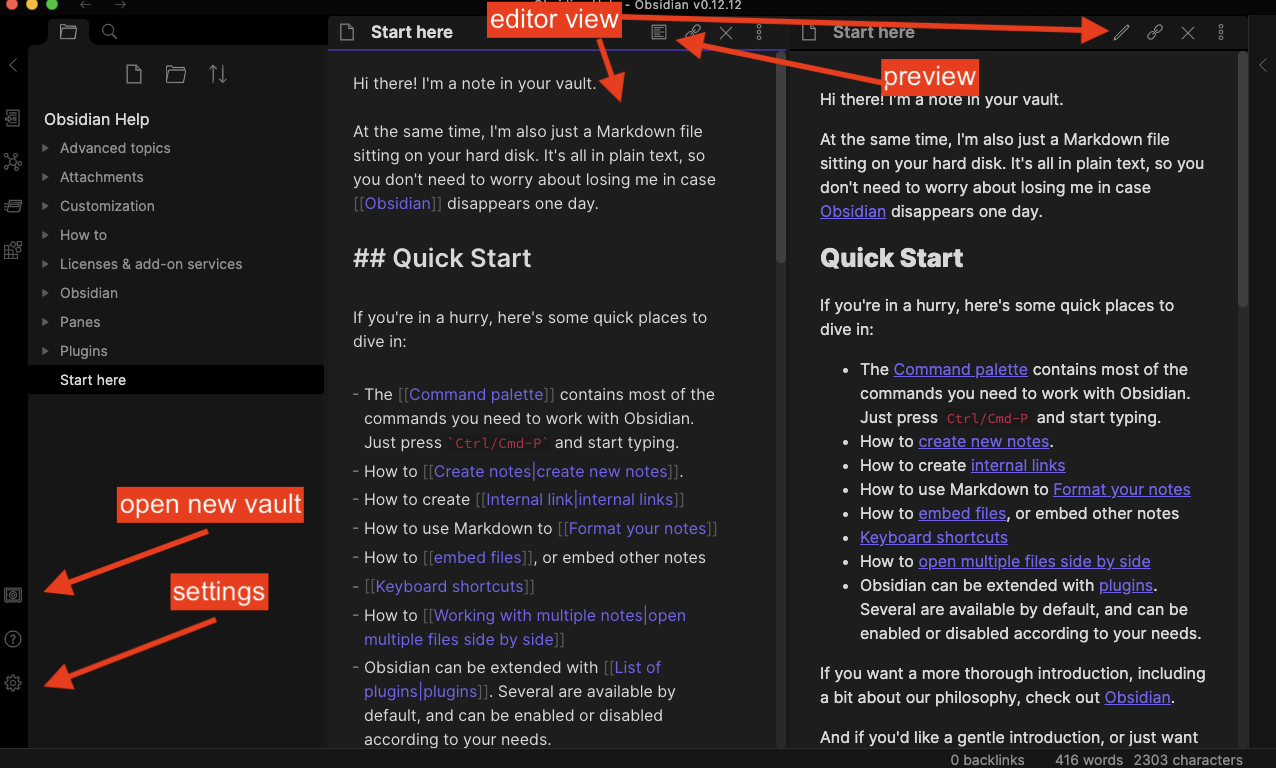
Open Obsidian, and explore the default ‘help’ vault. A ‘vault’ is just a folder where your notes are found. An important thing to know: the notes are all written in markdown, but somethings you have to hit the note ‘preview’ button to see what’s going on. Hit the note’s ‘pencil’ icon to get back to editing. The ‘help’ vault will give you a sense of how Obsidian works.
ctrl / cmd + ewill switch back and forth between ‘preview’ and ‘edit’;ctrl /cmd + nwill make a new note.ctrl / cmd + pwill open the ‘command palette’ which shows you every command available.
- When you’re familiar with the interface, click the vault icon to open a new vault; find and select the ‘DH Lab Notebook’.
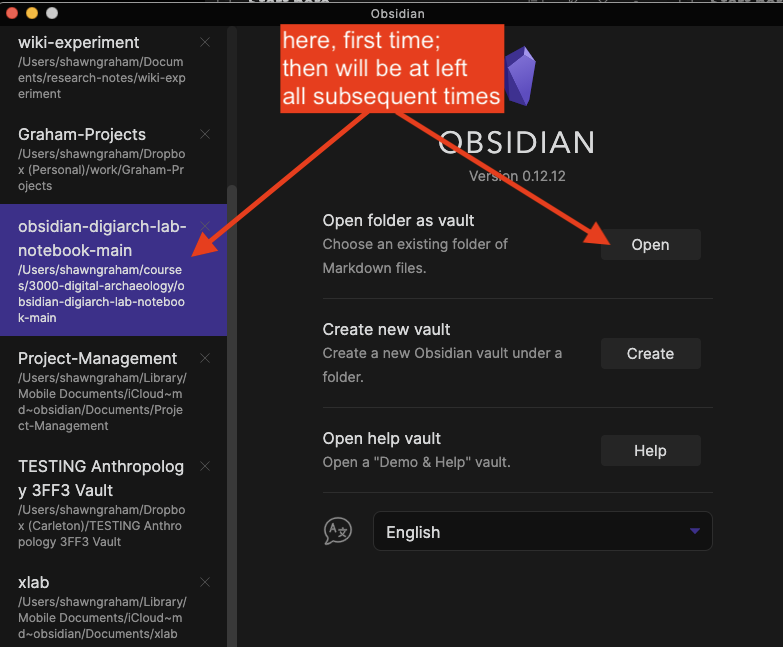
select a different vault; in these screenshots I’m using a vault from a different class, but it’s really just a difference of labels.
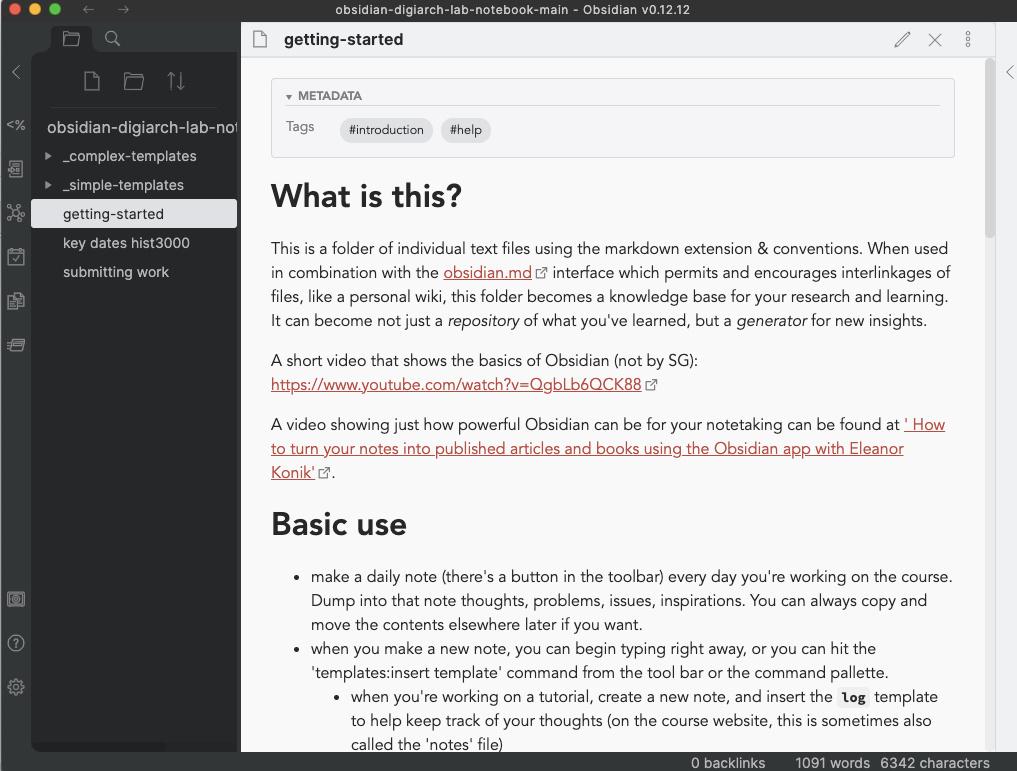
Note that I have the vault opened in the ‘preview mode’. Note also the file explorer at left.
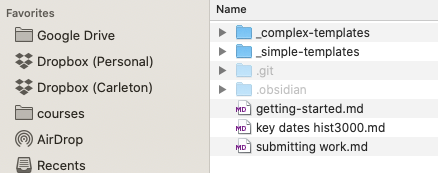
The same ‘vault’ opened in my computer’s finder/file explorer. Any note I make here can be copied to somewhere else.
When the warning popup about community plugins & safe mode appears, turn safe mode OFF; if the settings pop-up opens, just hit the ‘x’ button to close it. You’re now good to go!.
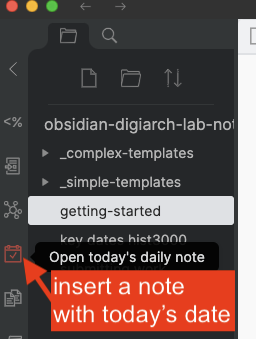
As you try the various tutorials in this class, you can also keep notes via Obsidian’s ‘daily note’ feature; this might be handy!

- As you progress in the course, you will want to be creating repositories on Github to lodge all of the ephemeral files you create, your data, your results. You can drag and drop any files you create in your obsidian vault - like a log/worksheet etc - into that repository.
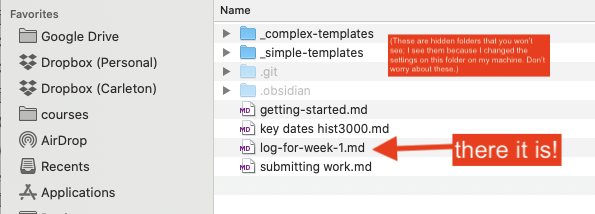
There’s your note. You can drag-and-drop it into a github.com repository.
When I ask to see a ‘log’ file, that’s what I’m talking about - a note created using the ‘worksheet’ template that you’ve copied out of your vault and into the repository for your experiments.
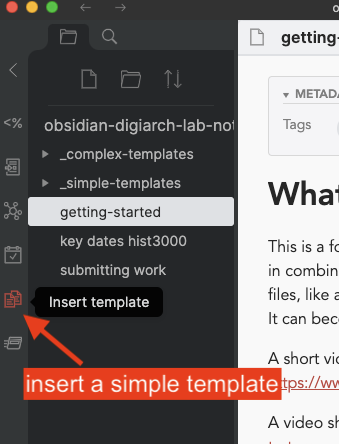
Not required but maybe helpful: This vault comes with a ‘complex template’ for retrieving annotations from the web made with hypothesis. To use this complex template, make a new empty note and then select the
<%from the tool ribbon. In the pop-up select ‘hypothesis’. The first time you do this, the template will ask you to insert your ‘hypothes.is user token’. You can find this by being logged into the hypothes.is website, and then going to https://hypothes.is/account/developer and finding the token on your user page - it looks like a long string of gibberish. Paste this in to the pop-up box in Obsidian. (This token gives Obsidian permission to query Hypothesis for your annotations). Then, Obsidian will ask you for the URL of the page you wish to extract annotations from. Insert the full address et voilà. A new note with your annotation!
As you progress through the course, take the time to spot connections between your different notes. Use [[ and ]] to connect keywords in your notes to other notes. With time, you’ll start to ‘connect your thinking’ and this will make it easier for you to see how your understanding is growing, changing, and becoming more sophisticated. Indeed, if you wanted, I would encourage you to put all your notes from all your classes into Obsidian, and look for those interlinkages. It will be transformative!
(A vault with many more bells-and-whistles crafted especially for history students is available here and you’re welcome to give it a try too. This ‘vault’ is configured with plugins to make it easy to import zotero notes and bibliography. It has a template to go out and grab your hypothesis annotations. It has a template to create timelines from notes that detail events. If you drop an image file into the vault, it has a template to do OCR on that image and paste the resulting text into a new note. There are tools in there to help you find connections between your notes; one of them will examine your note and then use some text analysis to find related notes based on the text.)
Give it a try; let me know how it works.