Command Line Basics for PC
A guide to getting started with the command line in the terminal on a PC.
This tutorial was written by Chantal Brousseau.
Written Walkthrough
If you’re brand new to this, I strongly recommend you start with watching the video first because it’s much more detailed. Of course, if you’re confident in your technical abilities or just looking for a refresher, then this written guide to the command line is for you!
Step 1: Accessing the Command Line
So first thing we’re going to want to do is actually open the command line so you can see what it is.
To navigate the command line in Windows, you have 2 options:
You can use the pre-installed Windows Powershell that you can find by serching “powershell” OR
You can download the shiny new Windows Terminal from the Microsoft store– it was release just last year and as you can see:
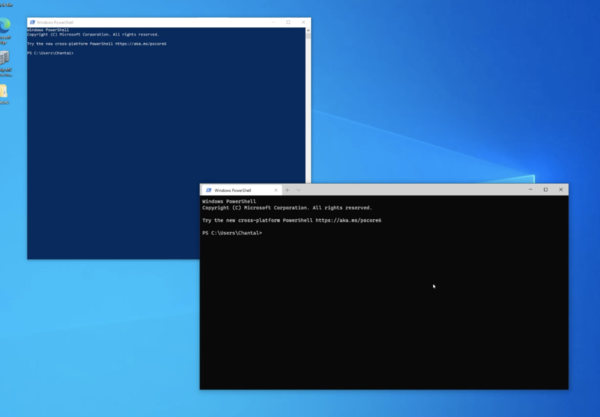
They basically look the same by default. BUT Windows Terminal has nice features that you’d find on other modern operating systems like tabbing and the ability to customize the theme that can make working with it a smoother experience, SO I’ll be using this for the tutorial.
With all that being said, you’re probably looking at your screen now like “okay but what IS this?” Well, it’s in the name! The command line is a text interface for your computer, meaning its like your whole computer and everything it does, typed out!
When using the command line, instead of clicking to tell your computer what to do, you type what you want to do as a command instead! In this class, we’ll being mostly using the command line to navigate file directories and run code and software.
A good way to make all of that less confusing is to just start with showing you some basic commands, so we’ll start with the simplest task: navigating directories!
Step 2: Navigating Directories
A “directory” is essentially a folder on your computer. In the terminal, before the arrow, you’ll see something like
C:/Users/[your-user-name]
That indicates that you’re in your home directory which is good, because it’s always where you want to start from! In the File explorer it corresponds to here (This PC):
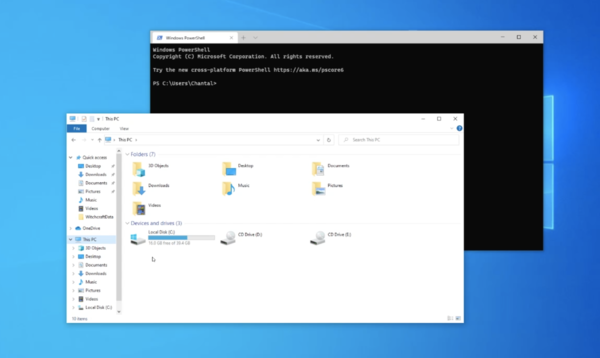
This is basically the Ultimate Folder that has all of the user’s aka your “default” folders, which means from here you can go anywhere else on your computer.
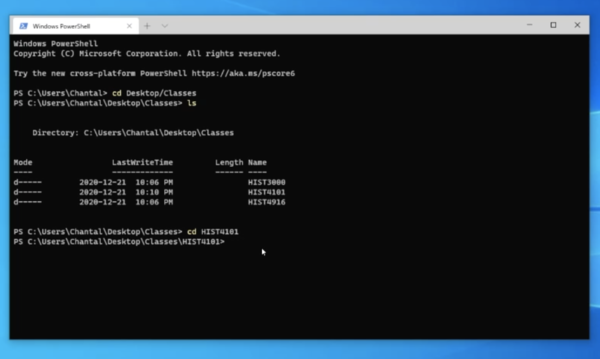
So, let’s say I want to go over a folder called Classes on my Desktop. First, I’m going to type cd which stands for “change directory”.
The next part is sort of just like, you’re thinking about where you want to go, then typing it out! So first I need to get to my desktop, and then I want to be in my folder for Classes. The full command will look like:
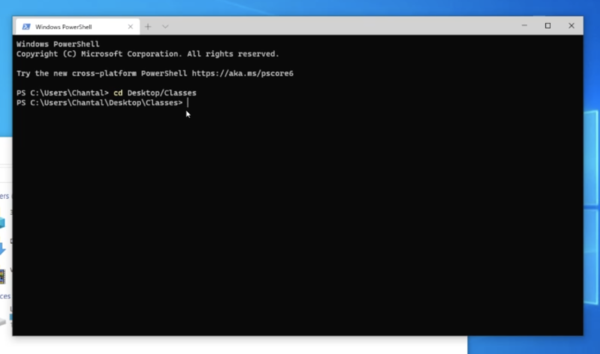
cd Desktop/Classes
Now when I hit enter, the file path before the arrow has changed which lets me know I’m in the Classes folder:
Windows is nice for navigating directories, because if you ever need to go to a specific folder but are unsure of the path, open the folder up in File Explorer, highlight the contents of the address bar, and right-click to copy:
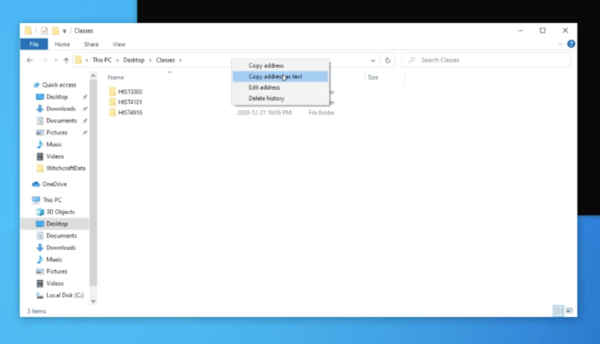
Then go back to the command line, type cd, and paste!
Now, lets say you want to see what’s actually in your directory. In File Explorer, you just click the folder to see a list of files. In the command line, to display the content of the folder (aka the directory) you’re in, you type ls– list! This is especially useful for occasions when you forget the EXACT name of the directory you need to go to, because you can just get to a point that you DO know, like where we are now, and then look at the list and “ah yes, that’s the code for that course” then cd HIST4101:
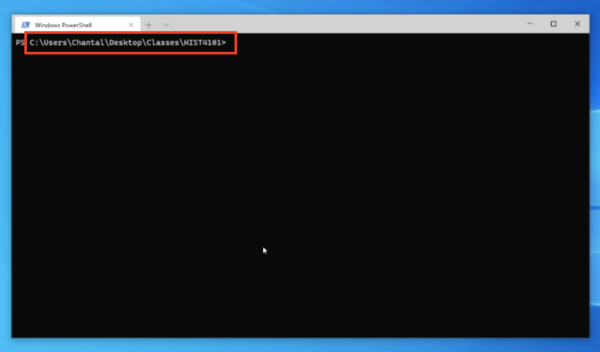
Okay so now we’re just going to clean things up by typing clear.
As the command suggests, this clears all of your previous work from the command line. You are ready to start anew! Though, do note that this does not reset the terminal, so you’ll still be in the directory you were last in:
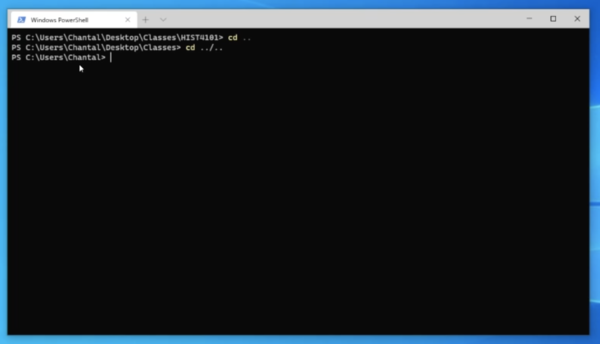
If you want to go “back” one directory, you can type cd .. which takes you back to Classes. If you want to go all the way back to the home directory, you can do that multiple times in a row:
If you’re worried about forgetting a command you used earlier, don’t let that be a reason not to clean up your workspace! You can just use the up and down arrow keys to scroll through a list of the commands you’ve previously entered!
If you’re hesitant about clearing because you think you might need to reference output from earlier earlier work, like error messages or ls results, in the Windows Terminal specifically you can just open a new tab! Though opening a new tab IS opening a new terminal, so if you want to keep working in the same directory you’re going to have to cd into it again.
And that’s all! Now you know how to use the command line well enough to succeed in this class!
Step 3: Additional Practice and Resources
To help you get more familiar with Powershell, firstly, here’s a cheatsheet that details the numerous other things you can do from the command line.
Secondly, here are some links to guides about customizing the appearance of Windows Terminal that I encourage you to check out: