Object Character Recognition - OCR
There are many images and pdfs of historical documents out there; turning them into text is the point of OCR. The technique
Introduction
Object Character Recognition is a technique that looks at the pattern of light and dark pixels in an image and matches them against the alphabet. The technique was developed against clean type-written pages where the letters were crisply made. On historical documents, things can get pretty hit-and-miss. When we searched the Chronicling America website, we were actually searching the OCR’d text that was embedded in each of those pdfs (if you can select text in a pdf, it has a hidden text layer on top of the image. If you can’t, it’s just an image). We probably missed a lot of information because we searched for ‘archeology’ but it’s entirely possible the word got transcribed as ‘arc50log’ or other similar mismashes. Just because you searched, didn’t mean you found what was there!
In this walk through, we’re going to use the R language to run some images through the OCR process. Think of these as recipes that you can use.
One file at a time
- Open Anaconda Navigator, and hit the ‘Install R Studio’ button.

- Launch R Studio
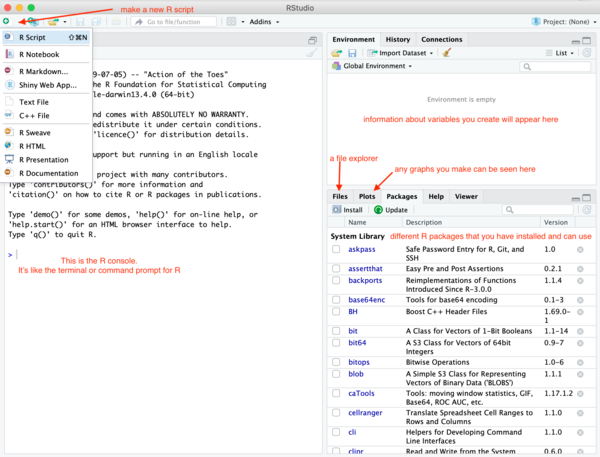
- RStudio has within it a console, a script editor, a file explorer, and lots of other features. Click on the new button to make a new R Script.
We are going to OCR this image, from the 14th Canadian General Hospital war diaries:
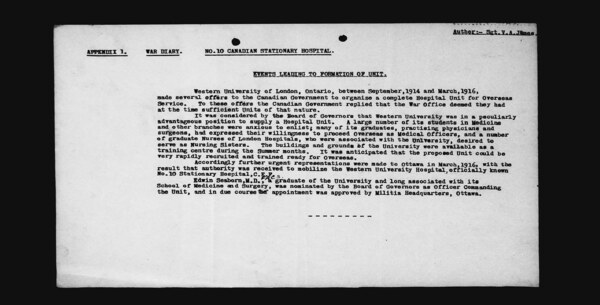
Right-click on that image, ‘save-as’, and save it somewhere sensible on your computer.
Using the file explorer in R Studio, navigate to where you saved that file.
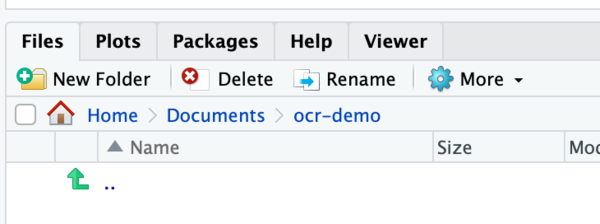
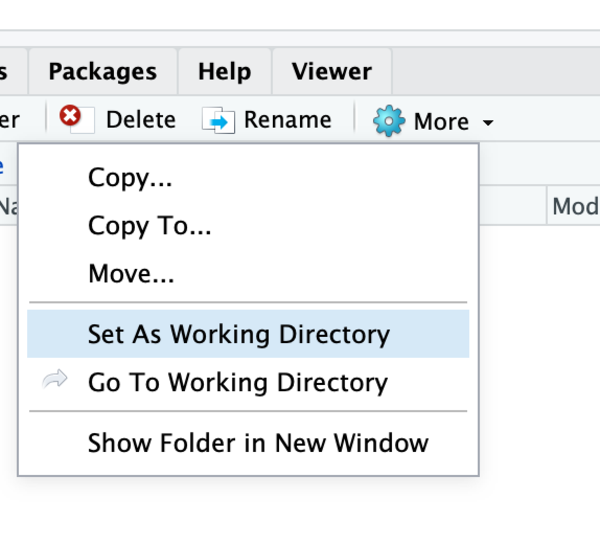
Make that folder your ‘working directory’; you can do this by clicking on the ‘More’ button beside the cogwheel. When you do this, the actual R command that achieves this will also copy into the console. R Studio now knows where to look for files, and where to save them.
- In the script window, paste the following lines:
# install only the first time
install.packages('magick')
install.packages('tesseract')
install.packages('magrittr')
We’ll only run these lines once, because once we’ve installed these bits of lego, we won’t have to install them again; they’ll always be available for use. Highlight all of them with your cursor, and hit the ‘run’ button at the top of the window. Running the lines passes them to the console where they are executed; you’ll see a bunch of information scroll by as they install. Then, when it’s finished, you’ll see the > prompt again.
- Add to your script these lines:
# tell R which packages you need
library(magick)
library(magrittr)
library(tesseract)
And run them. Down in the console, nothing much should happen, but you should get the > again.
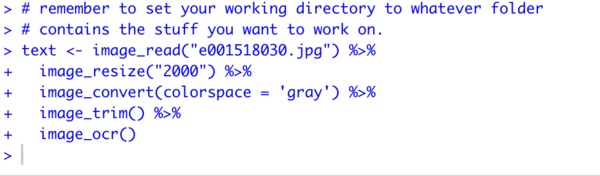
- And now let’s ocr some text. Add these lines to your script:
# now let's create a variable called 'text'
# and read the image into it
# and we'll modify the image to give us
# the best chance of reading the text
# the final line, image_ocr() does the text extraction

# remember to set your working directory to whatever folder
# contains the stuff you want to work on.
text <- image_read("e001518030.jpg") %>%
  image_resize("2000") %>%
  image_convert(colorspace = 'gray') %>%
  image_trim() %>%
  image_ocr()
If you put your cursor at the ’t' in ‘text’, and hit ‘run’, R Studio knows that all of these lines are joined by the %>% function, or pipe, and so will run everything in order to the final command, image_ocr().
You know it ran, because it passed the commands to the console, and you got the command prompt back.
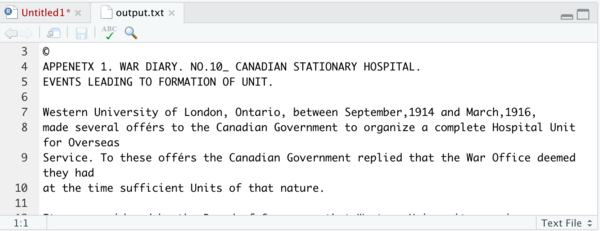
- Finally, let’s see what we’ve got! Add the following line:
write.table(text, "output.txt")
and run it.
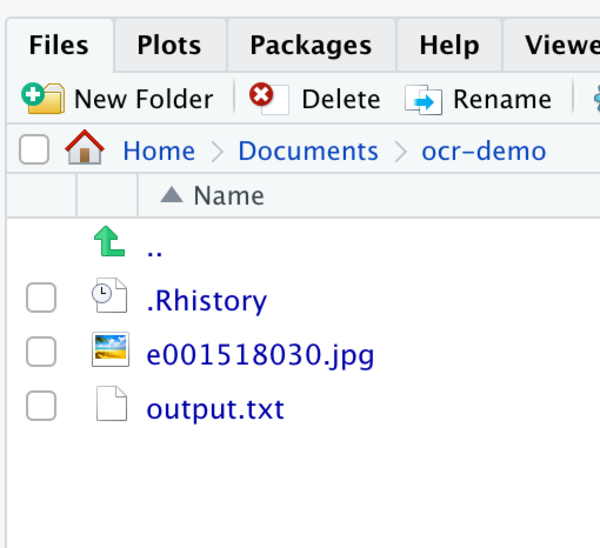
Save your R script as “one-image-ocr.R”.
Looping over many files at once
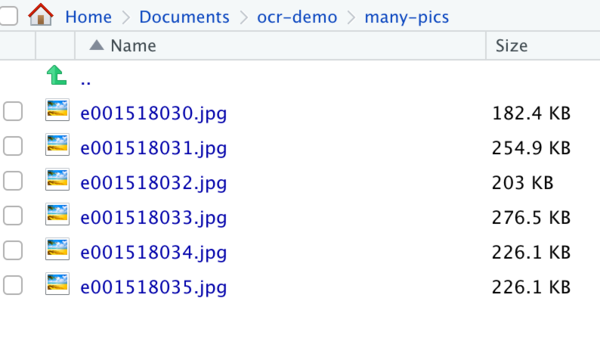
- Grab a handful of images from the war diary and save them inside the folder you are working in, in a new subfolder (three or four are fine; I just right-clicked and save image on the urls at http://data2.archives.ca/e/e061/e001518034.jpg http://data2.archives.ca/e/e061/e001518035.jpg etc for the purposes of this recipe).
- Now, we’re going to modify the first recipe to include a loop, and to apply the image modifications and to do the ocr to each image in turn. Make a new script, and then put into it which libraries you’re going to use. Run those lines.
# tell R which packages you need
library(magick)
library(magrittr)
library(tesseract)
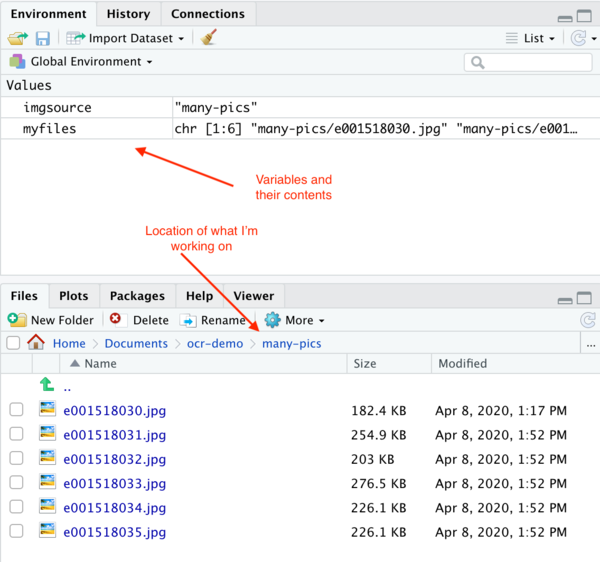
- I put the files I wanted to work on into a subfolder called ‘many-pics’. Now we create a variable called ‘myfiles’ into which we’re going to put the list of files held in our directory of files.
imgsource <- "many-pics"
myfiles <- list.files(path = imgsource, pattern = "jpg", full.names = TRUE)
Put these lines into your script, then run them. Over in the environment pane, you’ll see them get created, and you’ll see what’s inside them.
- Now the loop. Copy this into your script:
lapply(myfiles, function(i){
text <- image_read(i) %>%
image_resize("3000x") %>%
image_convert(type = 'Grayscale') %>%
image_trim(fuzz = 40) %>%
image_write(format = 'png', density = '300x300') %>%
tesseract::ocr()
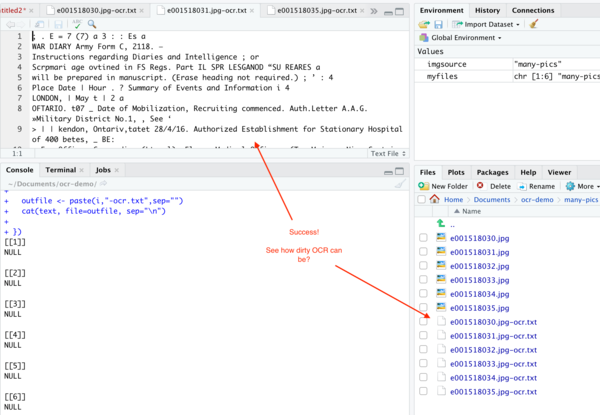
outfile <- paste(i,"-ocr.txt",sep="")
cat(text, file=outfile, sep="\n")
})
Techically, this isn’t actually a loop. We’re just applying all of this image fixing and text extraction to each file in our myfiles variable, and then creating a unique text file appending -ocr.txt to the original filename. Put the cursor at the l in lapply, and then hit run; the machine will take some time to do its thing, but then…
Now imagine how much you’re missing when you do keyword searches of OCR’d documents…
Save your work.
What about handwriting?
Handwriting is a much more complicated problem, but in recent years machine learning has made enormous strides in this regard. I will point you to some documents I prepared for another class of mine if you want to explore this problem.
‘Detecting and Transcribing Handwriting with Microsoft Azure and then Importing into Tropy’